This is the fourth post in the Lazygit series. You can see a list of all of the posts in this series by visiting the Lazygit Series tag. This week, we’ll look at how to best use the branches panel.
Lazygit’s branches panel allows you to manage the branching strategy for your project. You can see which branches you’ve currently got available, create new ones, remove unneeded ones, and see their sync state with your remote(s). Branches can be checked out, merged and rebased right inside Lazygit.
Other tabs on the branches panel allow you to review which remotes are current configured for your repository and which tags are defined.
Navigating the Branches Panel
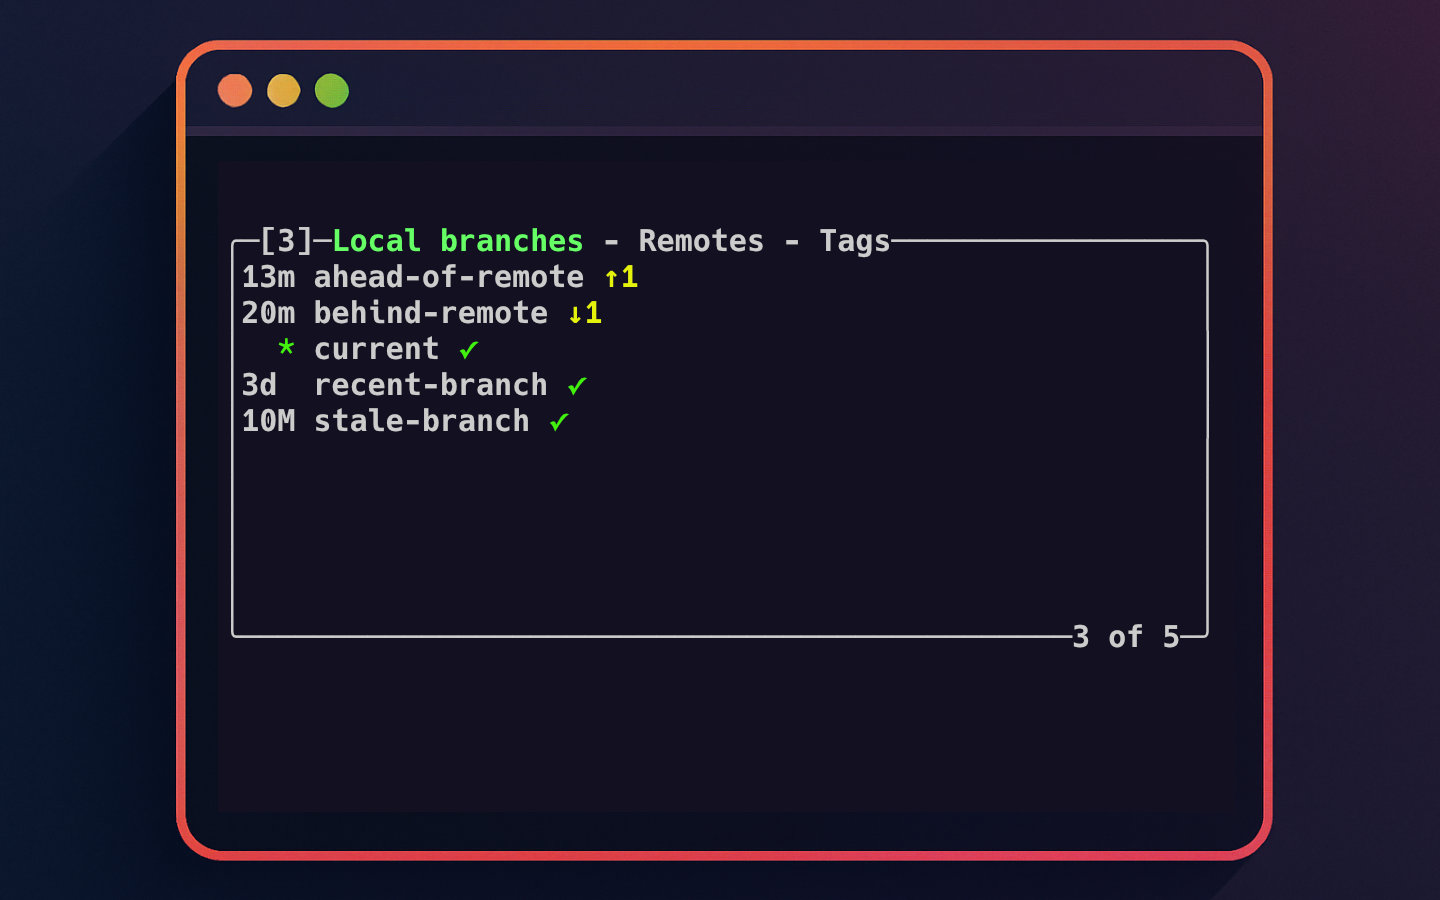
The branches panel is the third panel from the top in Lazygit, accessible by pressing 3 in the interface.
Here, you will find a list of your local branches, with your currently checked-out branch indicated by an asterisk *.
For each branch, Lazygit displays its status relative to its remote-tracking branch, if any. Arrows pointing up or down indicate commits ahead or behind the remote, respectively, giving you a quick visual clue about what needs syncing.
You can navigate this list using the arrow keys on your keyboard.
Creating, Renaming, and Deleting Branches
Managing branches in Lazygit is simple and efficient.
To create a new branch, press
nwhile in the branches panel. You will be prompted to enter the new branch name, and Lazygit will create and check it out immediately.To rename a branch, select the desired branch and press
R(uppercase). After typing the new name, Lazygit will rename the branch accordingly.To delete a branch, select the branch you wish to remove and press the
dkey. Lazygit will ask for confirmation before deleting to prevent accidents.
Remember, you must have the branches panel active when performing these actions for the shortcuts to work.
Checking Out Branches
Switching between branches is one of the most common operations during development, and Lazygit makes it straightforward.
Press the spacebar on a selected branch to check out that branch.
If you have local changes that conflict with the checkout, you can use the force checkout by pressing
F. This will discard your local changes and switch branches immediately, so use with caution.
An alternative way to explore a branch without switching to it is to press Enter.
This opens the list of commits in the selected branch, allowing you to review branch history without changing your working directory.
Syncing Branches with Your Remote
Keeping your branches in sync with remotes is crucial for smooth collaboration. The currently checked out branch can be synced using simple keyboard shortcuts:
Pull updates from the branch’s remote by selecting the branch and pressing
p. This fetches and integrates changes from the remote tracking branch.Push your commits to the remote by pressing
P. If you’ve created a new branch locally, this is the step to share it upstream.Fetch the latest changes from the remote repository by pressing
f. This updates remote-tracking branches without altering your local branches.
To help keep your local repository clean, it’s recommended to enable Git’s automatic pruning of remote branches with:
git config --global fetch.prune true
This ensures that deleted remote branches don’t clutter your view in Lazygit.
Merging Branches in Lazygit
Merging is a key part of integrating changes from one branch into another.
In the branches panel:
- Select the branch you want to merge into the current branch.
- Press
M(uppercase). - Lazygit will initiate the merge process, offering options such as regular merge or squash merge.
If conflicts arise during the merge:
- Lazygit will clearly indicate conflicted files in the files panel.
- You can navigate to those files and open the diff view to resolve conflicts interactively.
- Once resolved, return to the branches panel to continue.
After a successful merge, you can commit the merge changes and push them to your remote if needed.
Rebasing with Lazygit
Rebasing is another powerful way to integrate changes while maintaining a clean commit history.
To rebase your current branch onto another branch:
- Navigate to the branch you want to rebase onto in the branches panel.
- Press
r. - Lazygit will start the rebase operation.
Interactive rebase is also supported:
- Choose a commit in the commits panel (accessed with
4). - Press
eto start interactive rebase from that commit. - You can reorder, squash, edit, or skip commits in the interactive rebase interface.
Additional rebase utilities include:
- Press
B(uppercase) on a commit to mark it as the base for rebase operations. - After conflicts during rebase, resolve them using the files panel and continue rebasing with Lazygit’s interface guidance.
Note that during rebasing, you should be cautious. If you are working on branches shared with others, a rebase may be ill advised. Rewriting history, which is what rebasing does, can cause hard-to-resolve complications. Generally you should only rebase a branch you are the sole developer on.
Exploring Branch Commits and Other Tabs
While in the branches panel, you can press Enter on a branch to explore its commit history without switching branches.
You can also switch between the following tabs in the branches panel:
- Local Branches: shows your working and tracked branches.
- Remotes: lists all branches on configured remotes.
- Tags: displays tags defined in your repository.
This tab switching can be done by pressing [ and ] to move left or right through the tabs.
For example, inside the remotes tab, you can select a remote branch and press spacebar to check it out locally.
Opening Pull Requests and Other Actions
Lazygit also offers the possibility to open pull requests from branches with a simple keypress (o), which will open the selected branch’s PR page in your browser.
This saves you from choosing the pull request creation options manually on your repository host’s website.
While this post focused on branch creation, switching, merging, rebasing, and syncing with remotes, Lazygit supports much more, including stash management, conflict resolution, and interactive commit editing.
Wrapping Up
Lazygit’s branches panel is a powerful, efficient way to manage your project’s Git branches without leaving the terminal.
You can create, rename, delete, checkout (including forced checkout), merge, rebase, and sync branches with remotes — all using simple keyboard shortcuts.
The ability to explore commits without switching branches, switch between local, remote, and tag views, and even open pull requests in your browser streamlines your workflow significantly.
Give it a try in your next Git session, and experience how Lazygit can speed up and simplify your branch management tasks.
Happy branching!